NetPlay Video Control4 driver setup:
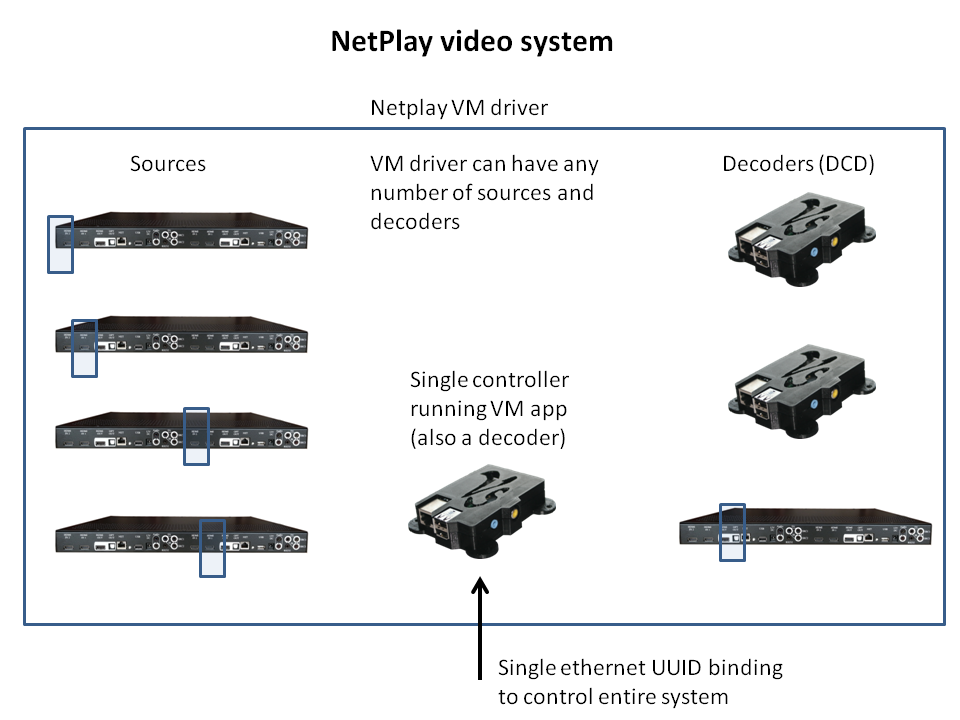
Each NetPlay video system is controlled by the Virtual Matrix application running on a single VRX device. The Control4 driver is bound to this application via a single IP connection. Virtual Matrix handles discovery, management, and communication to all other NetPlay devices in the system. Once you have complete Virtual Matrix setup using our web based interface, you can quickly setup the Control4 driver.
Driver architecture:
Driver setup:
The NetPlay avswitch driver will automatically be added to your project when you double click on the videostorm:avswitch:VTX => VRX010 uuid from the available devices list. This should also automatically bind the control port of this driver to the Vitual Matrix VRX uuid. Note that you should only see ONE VRX listed under the videostorm:avswitch:VTX category. If there are multiple, then you have more than one VRX running Virtual Matrix.
The videostorm:ipod:NBX category is used for NetPlay Audio drivers.
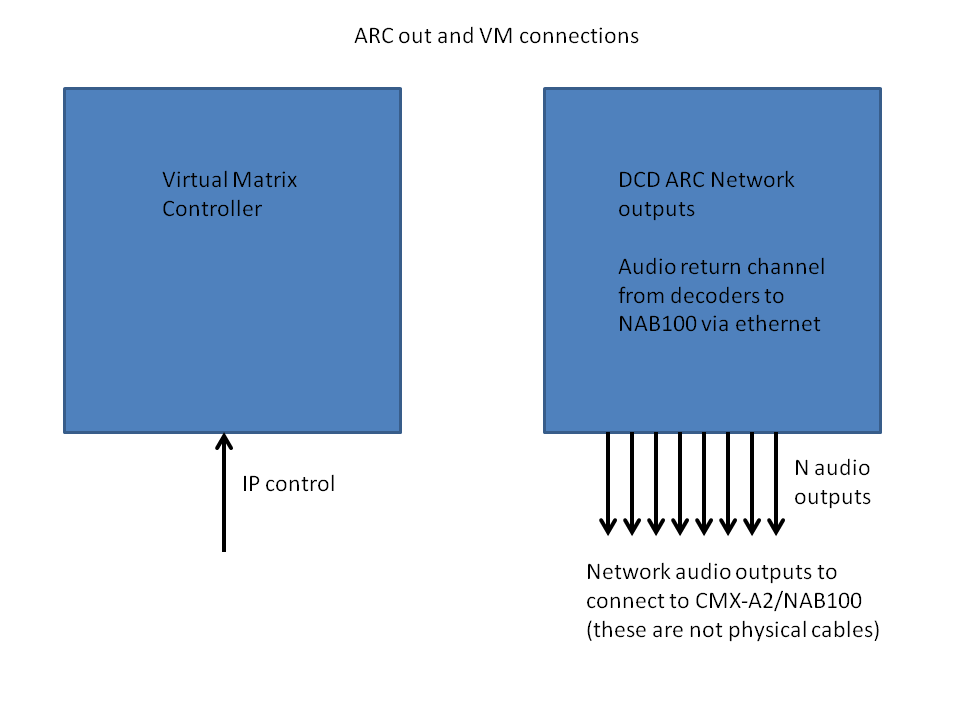
DCD ARC Network outputs can be connected to CMX-A2/NAB100 driver to support audio return channel via network. Connect the first 8 Network audio outputs to the 8 Network (phy) inputs on the CMX-A2/NAB driver. This is not needed if you do not have CMX-A2/NAB in the project. ARC can also be routed to any decoder audio output (in particular the VTX100 audio outputs) to support ARC in systems without CMX-A2/NAB. In that case, just hook the proper decoder audio output to your audio matrix/amp.
Next we will setup your sources:
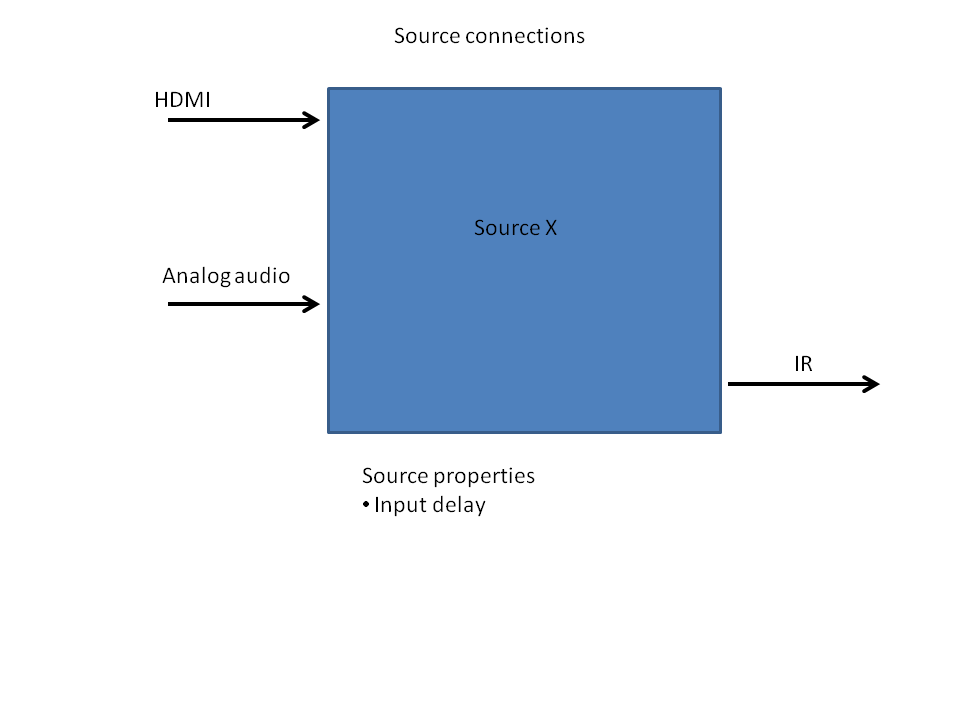
When using VTX100, each decoder board has 2 corresponding sources. This is configured in the Virtual Matrix setup. Attach your connections in the same numerical order as you configured them in Virtual Matrix.
The HDMI and audio connections should be tied to the source equipment driver. Note that if the source supports audio via HDMI (most do), then do not connect the analog cable or connection.
When using IP cameras or other supported sources, you should connect to the driver for that device. In most cases you can just use a dummy driver since C4 does not need to directly control these sources.
The IR output can be used to control the source equipment. In the driver, make the IR binding to the source. Physically you will attach the IR flasher from the corresponding IR SRC output on VTX to the source equipment.
The input delay property should be left unchanged unless your source has an intrisic AV mismatch (rare).
Finally, we will setup the decoders:
The decoders correspond to each VRX in the system and each VTX output. They will also include tablets, phones, and support smart TVs in later software revisions.
In the Virtual Matrix setup, you mapped each output number to a specific VRX or VTX. Make sure all your connections in Control4 follow the same numerical order.
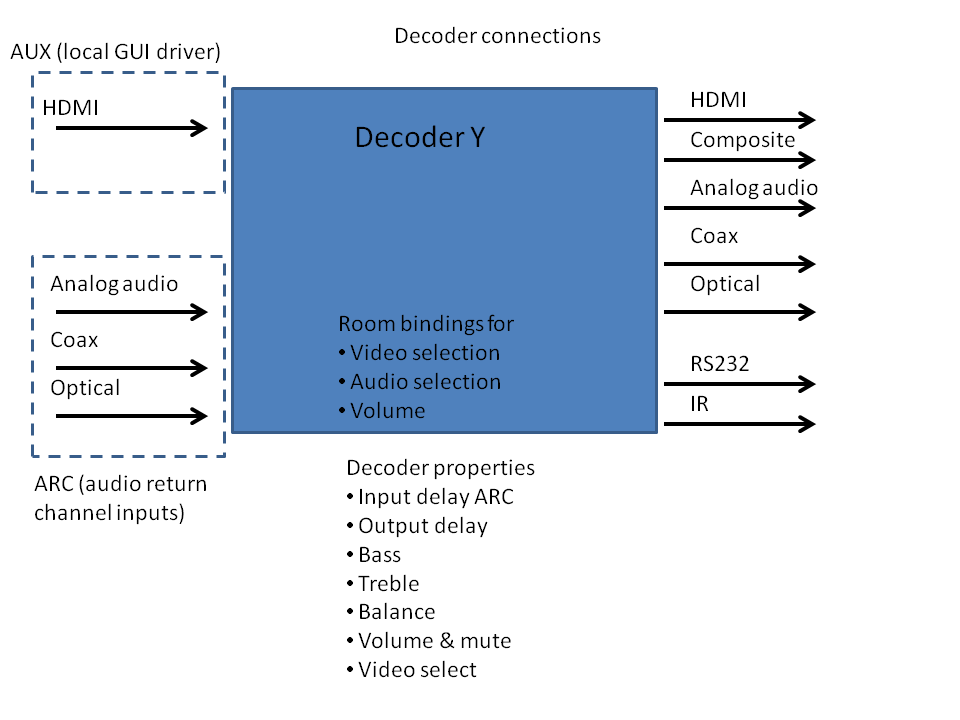
Connect the video and audio outputs to your display and audio equipment. Note that HDMI carries audio, so it is not always necessary to bind both.
The rs232 and/or IR outputs can be used to control equipment in the room. Bind them based on the physical routing you choose.
The Room bindings on the driver can be used if desired. Generally this is only done if you do not have proper drivers for the TV and speaker equipment.
The input and output delay properties should be left at default. NetPlay Video internally adjusts these, so manual control is not advised.
The ARC audio inputs can be used to forward the audio from the TV (smart tv apps, etc) back via network to either VTX or preferably CMX-A2/NAB. If you need this functionality, connect the audio here.
The AUX input is for connection to either:
Our XBMC gui driver: If using our XBMC media player gui, add an instance of the XBMC driver and attach to this input.
Our NetPlay audio driver: If using NetPlay audio, add an instance of the NBX driver and attach to this input
Our Digital Signage driver: If using digital signage gui, add an instance of our DS driver and attach to this input
None of the above: Leave this input unconnected.
Advanced setup: