Firmware update instructions
Step 1: Download the desired HEX file and BIN file from our website. Make sure you download the file for the correct product family. The HEX file will be used first to update the microprocessor. After that is complete, we will use the BIN file to update the FPGA.
Step 2: Connect a straight through RS-232 from your computers RS-232 port to the control port on the TMX.
Step 3: Run the program Hyperterminal on your PC. This is generally found under accessories / communications.
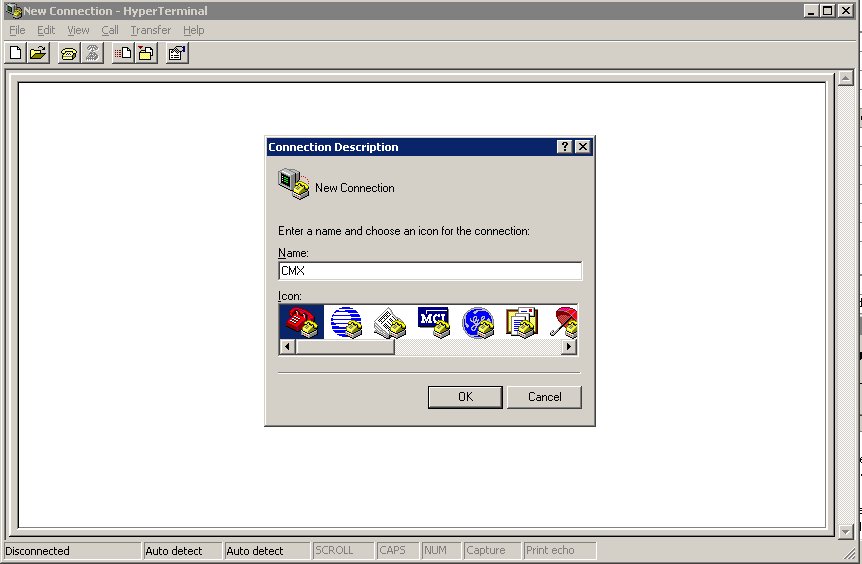
Step 4: You will asked to create a new connection. Type a name and hit ok.
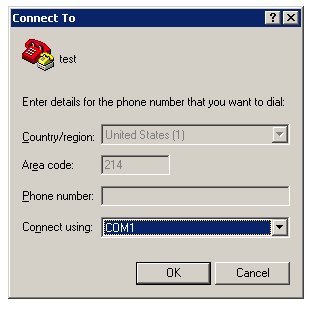
Step 5: Select Connect using COM1 (or the correct port for your RS-232)
: 
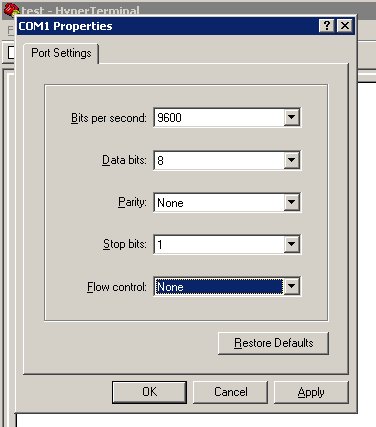
Step 6: Copy these port settings
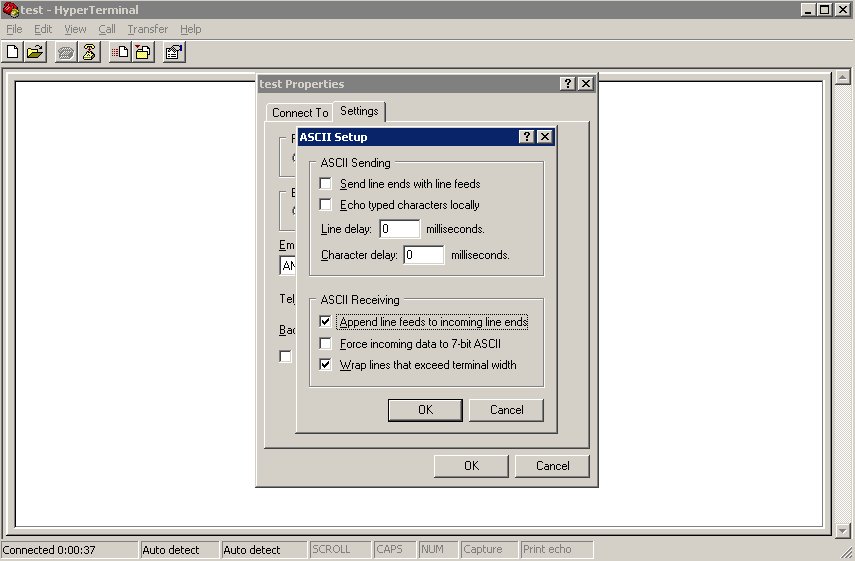
Step 7: Select "File - properties". Set Emulation to ANSIW, then click ASCII Setup
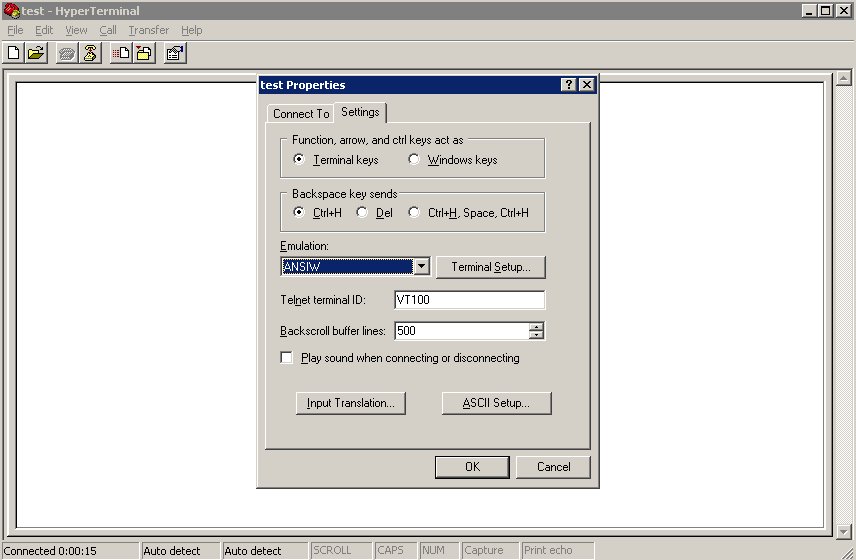
Step 8: Copy these settings, then click OK for both windows.
IMPORTANT NOTE: If you are using a USB=>RS232 adapter, please change the character delay to 1 millisecond. This will correct any download errors that could occur with the adapter.
Step 9: Now we need to power up the TMX and put it in PROGRAM mode. To put TMX in PROGRAM mode, type **BOOT## in the terminal window and hit enter. TMX will reboot and you should see the message "Type **BOOT## to enter bootloader" on your screen. You have to start entering **BOOT## within ~5 seconds to enter PROGRAM mode. If you enter this correctly, you will see the PROGRAM mode menu from step 10. Otherwise, you will see "STARTING" and the normal boot proceedure messages.
Step 10: Type H and hit Enter. You should see this. If your characters are not echoed to the screen your cable is not connected or you have the wrong COM port. If you see status from the TMX you did not enter PROGRAM mode.
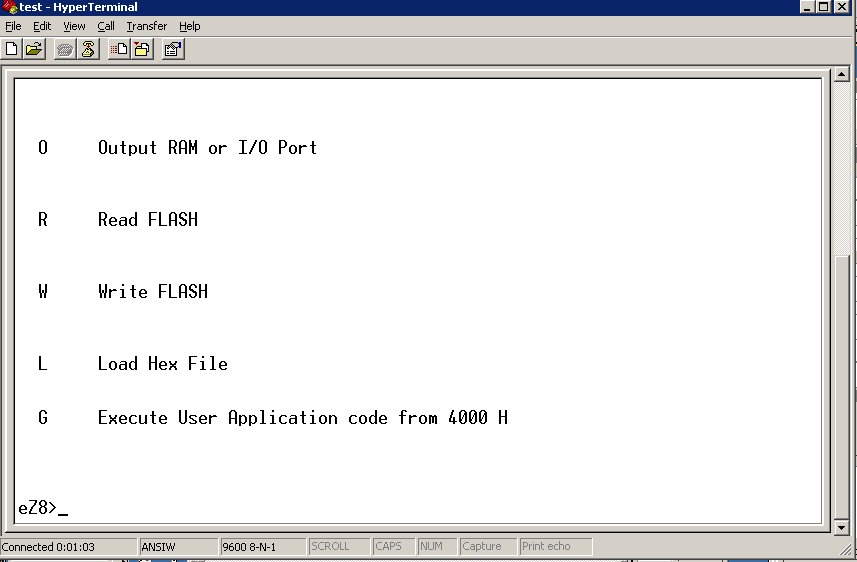
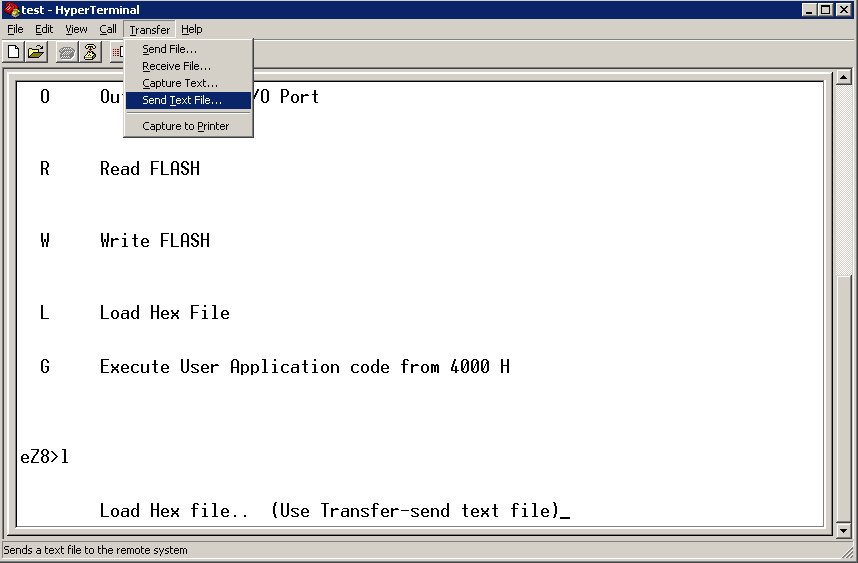
Step 11: Type L and hit enter. You will see "Load Hex file " returned. Select "Transfer - Send text file" and select the HEX file you downloaded. You will see a series of "...." as it loads.
Step 12: When download completes, you will see a summary. Verify that the Download errors = 0. If it does not check your connection and try again.

Step 13: Remove power from TMX and then reconnect it. If the device does not power on after pushing one of the front panel buttons you may have downloaded the wrong hex file. Repeat the procedure with the correct file.
Step 14: You will see the firmware version echoed to the screen during boot. Verify that this is correct.
Step 15: Now it is time to update the FPGA code. Start by erasing the current FPGA code. Type ERASEFPGA and hit enter.
Step 16: Once this command returns, you are ready to load the FPGA. Type UPDATEFPGA and hit enter. You should see "Start XMODEM transfer" on the terminal screen.
Step 17: Select "Send File" from the menu. NOTE: This is NOT send text file like we used to update the HEX file.
![]()
Step 18: Select XMODEM mode and the .bin file, then OK
![]()
Step 19: Wait for the transfer box to complete. Once it is at 100% wait 30 seconds and then close the window.
Step 20: Cycle power on TMX. You should see the normal boot proceedure in the terminal screen. Verify that the FPGA code is now correct.
Step 21: Connect RS232 back to your controller. The update is complete.